
Ready to reinvent your nose every day without drama? These ideas are fast, fun, and totally doable. FYI, you’ll love how small tweaks create big impact.
1. Shadow Play: Create Gentle Depth That Warms Your Center

Bulbous noses deserve soft drama, not harsh lines. This approach adds warmth while contouring to balance proportions.
Why it works: strategic shading mimics natural shadows and prevents that flat pancake look. Trust me, the difference is subtle but powerful.
Key Points
- Use a cool, matte contour shade just under the bulb and along the sides
- Blend in small circular motions to feather edges
- Keep highlight focused on the bridge, tip, and center of the nose
Tip: build slowly in layers for control. This isn’t a sprint; it’s a careful sculpture session you’ll enjoy.
2. The Split-Bridge Method: Define Without Narrowing

Sometimes you want definition without reducing the bulb. This method keeps the nose looking natural while creating a more balanced profile.
Here’s the vibe: emphasize the center line with a bright highlight and soften the edges with a light contour blend.
Tips
- Apply a thin line of highlighter down the center bridge
- Contour shadows hover just off the sides of the bulb
- Diffuse the edges toward the cheeks for a seamless finish
Benefits: softer angles, more symmetry, and a daytime-ready glow you can reapply at noon.
3. Cheekbone Lift, Nose Edition: Balance for a Softer Silhouette

Elevating the cheekbone area can counterbalance a bulbous nose because the eye naturaly hops between high points. This keeps attention on your best features.
Why you’ll love it: it creates a lifted look without hacksaw-level precision.
How-To
- Blend a subtle contour along the upper cheekbone toward the temple
- Apply a gentle highlight along the center of the nose to draw focus upward
- Keep the sides of the nose softly shaded, not boxed
FYI: this combo works great with a soft blush to bring life back to the cheeks.
4. Tip-Centric Contour: Accentuate the Nose Tip with Strategic Light

If you adore the button-nose vibe or a more pronounced tip, target the tip with a bright highlight and a touch of shading to sculpt its shape.
It’s all about the light. You’ll get a defined tip without rigidity—perfect for selfies and real life alike.
Key Points
- Highlight precisely on the tip to bring it forward
- Softly shadow the sides just below the tip to contour
- A touch of powder helps set everything without looking flat
Application note: use a light hand, then tap with a fluffy brush to blend. You want crisp lines only where you intend to show dimension.
5. Layered Sculpt: Build Dimension in Thin, Transparent Strata
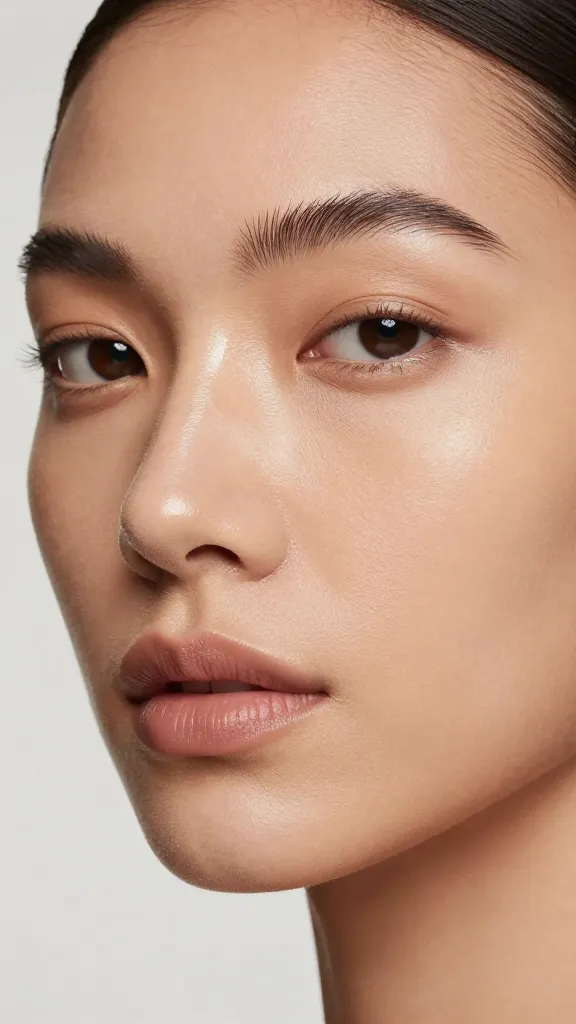
Layering multiple sheer shades makes the nose look naturally sculpted rather than carved in stone. It’s makeup-as-paint—subtle but visible on close-ups.
This technique fits all skill levels because you’re building gradually. Plus, it’s forgiving if you go a little strong at first.
What to Do
- Start with a sheer contour close to the skin tone and gradually deepen
- Apply a highlighter in mother-of-pearl tones along the bridge
- Finish with a light layer of translucent powder for longevity
Result: a multi-dimensional nose that reads as naturally contoured in every light.
6. Light-Reflecting Glow: Brighten the Center, Soften the Bulb

Glow isn’t just for cheeks. A carefully placed catch-light on the bridge and tip can make the bulb appear gently curvier rather than bulbous.
Why this works: light fools the eye into thinking the nose is more slender where you want it and fuller where you want it to be framed.
Applicability
- Use a liquid or cream highlighter near the center of the nose
- A subtle satin powder on the sides keeps everything in check
- Balance with a light contour shadow just beneath the highlight
Best practice: don’t go overboard with shine. The goal is a natural, lit-from-within look, not disco fever on your face.
In practice, mix and match these ideas. IMO, you’ll discover a flexible toolkit that lets you tailor the look to your mood, lighting, and outfit. Seriously, experimentation is half the fun.
Remember to adjust based on skin tone, undertone, and how your camera renders color. FYI, natural light is your best friend for checking how the contour looks in real life before you snap a selfie.
Want a quick recap? Use the Shadow Play and Split-Bridge for daily balance, bring in the Cheekbone Lift for a more sculpted silhouette, emphasize the Tip-Centric approach for a playful focal point, layer with Layered Sculpt for depth, and finish with Light-Reflecting Glow to keep things luminous.
When to use these ideas? Daily wear, special events, photos, and when you want to experiment with shape without drastic changes. They’re adaptable and forgiving, which is exactly what you need in a makeup routine that’s supposed to feel fun—not stressful.
Now go grab your brushes, trust your instincts, and have a blast sculpting your look. You’ve got this, and your bulbs are about to get a glow-up that even your mirror will praise. Seriously.
With these six ideas in your stash, you’ll master a confident, flattering nose contour that highlights your best features and keeps the vibe you want—bold, balanced, and uniquely you. Ready to try? I bet you are.


