Black glazed nails don’t whisper; they purr. They’re sleek, mirror-shiny, and somehow make every outfit look deliberate—even if you got dressed in the dark. If you want a gel manicure that reads “effortless edge” with a side of cool-girl gloss, you’re in the right place. Let’s talk finishes, shades, top coats, and the little tricks that turn plain black polish into a glazed, high-shine moment.
Why Black Glazed Nails Hit Different
Black nails already feel chic, but add that glassy glaze and the vibe jumps to premium. The shine catches light like a freshly waxed car—except way cuter. You get instant polish (the look, not the product) without loud nail art or embellishments.
TL;DR: They look luxurious, they go with everything, and they photograph like a dream. Also, they hide chips better than lighter shades. Isn’t that the kind of functional glam we all crave?
Choosing Your Black: Cream, Jelly, and Everything Between
Not all black gels are created equal. If you’ve ever wondered why your black sometimes looks flat, it probably started with the base color.
Cream Black (Opaque)
– Most classic choice. Full coverage in 1–2 coats.
– Creates that deep, inky base that screams “high-end.”
– Perfect for the shiniest top coat results.
Jelly Black (Sheer)
– Gives a smoky, “tinted glass” effect.
– Layer for depth: 2 coats for soft gloss, 3 for a moody, see-through finish.
– Great for the glazed look if you want dimension and a softer edge.
Black with Micro-Shimmer
– Adds subtle sparkle under the glaze, like starlight at midnight.
– Still looks sophisticated, especially in low light when the shimmer catches.
Pro tip: If your gel lamp doesn’t fully cure thicker cream blacks, switch to a thinner formula or apply thinner layers. Uncured gel equals dullness—and nobody wants sad shine.
The Glaze Recipe: How to Get That Slick, Mirror Finish

You don’t need a patent leather budget to get patent leather shine. You just need the right combo and clean technique.
Prep Like You Mean It
– Shape and buff lightly. Smooth nails reflect light better.
– Push back cuticles and cleanse with alcohol. Oil is the enemy of shine.
– Use a rubber base coat if your nails need strength—smooth foundation, better glaze.
Layering 101
1. Base coat, cure.
2. Two thin layers of black (or jelly black), curing between coats.
3. Optional: a sheer “glaze” coat to add depth (clear builder gel or a thin rubber base), cure.
4. High-gloss no-wipe top coat, cure fully.
Key detail: Cap the free edge every time. That tiny swipe locks in the shine and reduces chips.
When to Buff (Yes, Really)
– If your black looks streaky or uneven, gently buff the cured color coat, wipe clean, then top coat.
– Buffing flattens ridges so your top coat can shine like glass. It’s the difference between “nice” and “who did your nails?”
Finish Options: Straight Gloss vs. Glazed-with-a-Twist
You can go full mirror, or add a hint of something extra—without losing the sleek vibe.
Pure Glass Gloss
– Use a high-viscosity, high-shine top coat for that “wet” look.
– Cure an extra 15–30 seconds if your lamp allows. Some tops reach peak gloss with a longer cure.
Chrome-Kissed Glaze
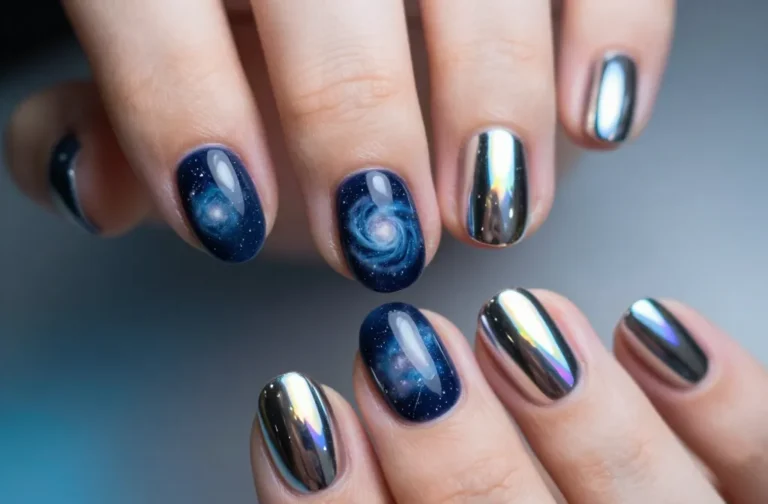
– Rub a tiny amount of silver or gunmetal chrome powder over a no-wipe top coat.
– Seal with top coat. You’ll get a subtle reflective sheen that still reads black—just… extra.
Oil-Slick Sheen
– Apply a whisper-thin layer of translucent blue, purple, or green syrup gel over black.
– Top coat. You’ll get that “raven feather” vibe—gorgeous in sunlight, still office-appropriate IMO.
Latex Gloss (Super Plump)
– Use a clear builder gel layer before top coat to add thickness and high-domed shine.
– Fabulous on short nails—you’ll get that luxe, gelly look without length.
Shape and Length: What Flatters the Glaze
Black plus shine can skew edgy very fast, so your nail shape sets the tone.
– Short squoval: Chic, wearable, zero fuss. Think “expensive minimalism.”
– Almond: Softens the darkness, makes hands look longer and elegant.
– Coffin/ballerina: If you want drama with major reflection. Great for chrome-kissed finishes.
– Stiletto: Pure attitude. Pair with a jelly black for a fashion-forward, editorial look.
FYI: Keep lengths proportional to your nail beds. Extreme length makes chips more likely and, IMO, the glaze looks best when you don’t worry about breaking a nail while opening a can.
Maintenance: Keep the Shine, Avoid the Dull

Gel stays glossy, but life is chaotic. Here’s how to keep that slick finish longer.
– Cuticle oil twice daily. Hydrated skin makes glossy nails look even shinier.
– Wear gloves for dishes and cleaning. Hot water + detergent = dull party crasher.
– Avoid alcohol-heavy sanitizers right after curing. They can cloud some top coats. Wash hands with soap instead.
– If shine fades, lightly buff and apply a fresh no-wipe top coat after a week. Instant reset.
Bonus: Keep a microfiber cloth in your bag. A quick wipe removes fingerprints and brings back mirror reflect in two seconds flat.
Black Glazed Nail Ideas You’ll Actually Wear
You don’t need nail art, but if you crave a little spice, try these minimal upgrades.
Micro French Glaze
– Thin black tip over a sheer nude base, then glaze with high-shine top coat.
– It feels modern and understated—like the quiet luxury version of a French.
Glazed Half-Moon
– Paint black, leave a tiny bare crescent at the cuticle, then top coat.
– The negative space keeps things airy without losing depth.
Satin-Matte x Gloss Combo
– Do a matte black base, then a glossy top coat just on the tips or as a swirl.
– Contrasts textures, not colors. Subtle but addictive.
Velvet Black (Magnet Cat-Eye)
– Use a black cat-eye gel and magnet to create a soft reflective line, then top coat.
– The glaze takes it from “cool” to “hypnotic.” Prepare for compliments.
DIY vs. Salon: What’s Worth Outsourcing
You can nail this at home (pun intended) with a solid lamp and patience. But if you want chrome, cat-eye, or builder gel layers with zero bubbles, a pro can save time and sanity.
– Go DIY if: you love simple glossy black, you have a decent LED lamp, and you can apply thin coats.
– Go salon if: you want complex finishes, extensions, or your black always wrinkles (usually a curing issue).
– Middle ground: DIY base color, then ask for a pro chrome or oil-slick overlay. Collaboration, baby.
FAQ
How do I prevent black gel from looking streaky?
Apply thin coats and float the brush on the second layer. If it still streaks, cure, lightly buff to level, wipe clean, and add another thin coat. A self-leveling gel formula helps a lot—check the label.
Why does my top coat look dull after a few days?
Harsh cleaners, hot water, and micro-scratches cause dullness. Wear gloves for chores, oil your cuticles, and refresh with a no-wipe top coat after a week. Also ensure a full cure—under-cured top coats lose shine fast.
Can I do a black glaze on short nails?
Absolutely. Short nails plus a plump, high-gloss finish look intentional and chic. If your nails are very short, try a soft squoval shape and a builder gel layer for a plush, glassy look.
Will black gel stain my nails?
Not if you prep right. Use a quality base coat and avoid over-buffing the natural nail. When you remove gel, soak properly and don’t scrape aggressively. Staining usually comes from skipping base or rushing removal.
What’s the best top coat for a glazed look?
Choose a no-wipe, high-shine, thicker viscosity top coat with great self-leveling. Some brands label them as “glass,” “diamond,” or “mirror” top coats. Test with a full cure, and, FYI, a strong lamp (48W+) helps.
Can I get the glazed effect without gel?
You can mimic it with regular polish plus a gel-like top coat, but the gloss and wear won’t match gel. For a weekend look, it works. For two-plus weeks of glass shine, gel wins, IMO.
The Final Swipe
Black glazed nails deliver max impact with minimal fuss, and that’s the beauty of them. Pick the right black, prep like a pro, and go heavy on the gloss. Whether you keep it pure glass or add a chrome kiss, you’ll get that sleek, high-shine finish that makes everything else you do look intentional. Want luxury without trying too hard? This is it.