
These ruby red gel nail ideas are bold, chic, and surprisingly easy to pull off. I’ll walk you through each design with quick tips so you can recreate them tonight. FYI, your manicure is about to become the talk of the group chat.
1. Classic Ruby With a Modern Twist

This design sticks to the timeless red gel but adds a contemporary edge with sleek negative space and a glossy finish. It’s the confidence boost your nails deserve.
Why it’s awesome
Simple, sophisticated, and endlessly versatile. You can wear it to work, a date night, or brunch with friends without missing a beat.
- Pure, high-gloss ruby red
- Subtle negative space accents
- Long-wear formula that resists chipping
Tips: Keep lines clean with striping tape. If you’re new to nail art, practice the negative space shapes on a piece of practice paper first. Trust me, it saves a lot of cleanup later.
2. Ruby Red with Gold Accents

Gold details instantly elevate any red manicure, giving it luxe vibes without trying too hard. This look screams “I show up for myself.”
Key Elements
- Shiny ruby red base
- Delicate gold foil flecks or thin gold lines
- Accent nail with a small gold embellishment
How to execute: apply a thin gold striping detail with a steady hand or use gold foil sheets for a speckled effect. If you mess up, you can just fill the nail with red again and redo the gold—no drama.
3. Matte Ruby with Gloss Pop

Matte finishes have that chic, modern vibe, and pairing them with a single glossy accent nail creates a striking contrast. It’s unexpected and totally wearable.
What to know
- Matte ruby red nails for most fingers
- One glossy accent nail on the ring finger
- A quick top coat helps the matte look last longer
Pro move: keep the glossy nail clean and reflective—tiny fingerprints will glare under bright light, so wipe gently before stepping out. Seriously, it matters for that photo glow.
4. Velvet Cherry: Deep Ruby with Texture
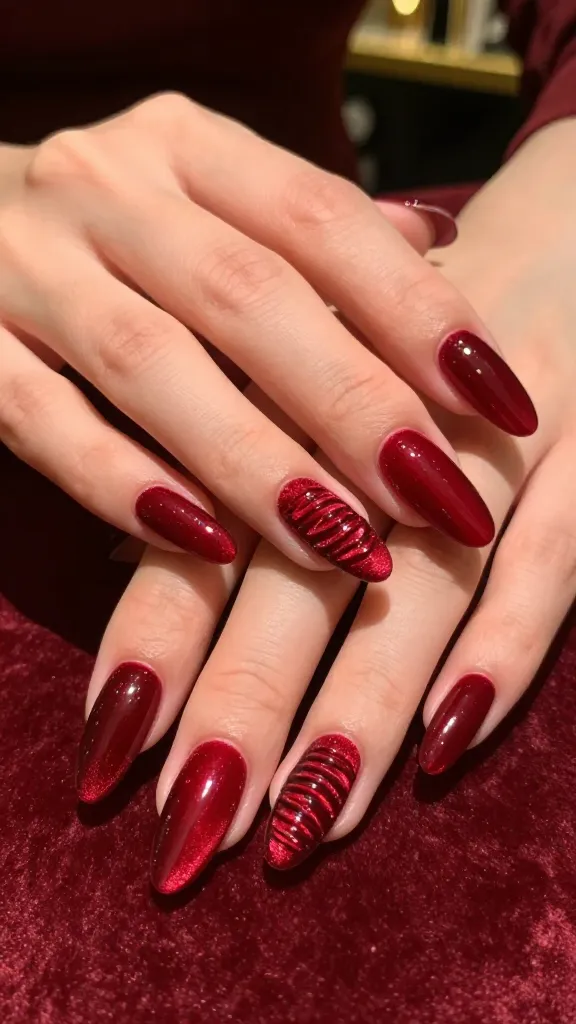
Texture adds depth without changing the color. Velvet-like finishes or subtle shimmer in the rubies give a hotel-lobby glow under dim lights.
Texture options
- Velvet or flocked top coat for a soft, plush finish
- Fine glitter sprinkled over the wet top coat
- Ribbed accent on one nail for a bold punch
Why this works: texture catches light differently, making the red look richer. Use a light hand with texture products—nail pride is all about balance.
5. Minimalist Ruby with Bold Tips

Less is more, but not boring. A muted ruby base with graphic, bold tips gives you a modern edge. This is your “adulting but fun” manicure.
Key Points
- Soft ruby base with a narrow white or black tip
- Sharp, clean lines for the tip design
- Optional tiny dot accents near the tip
Application hack: use a fine liner brush for the tips and wipe the brush on the edge of the bottle to keep lines crisp. FYI, tidy lines read as high-end even on short nails.
6. Ruby Red Ombré Glow
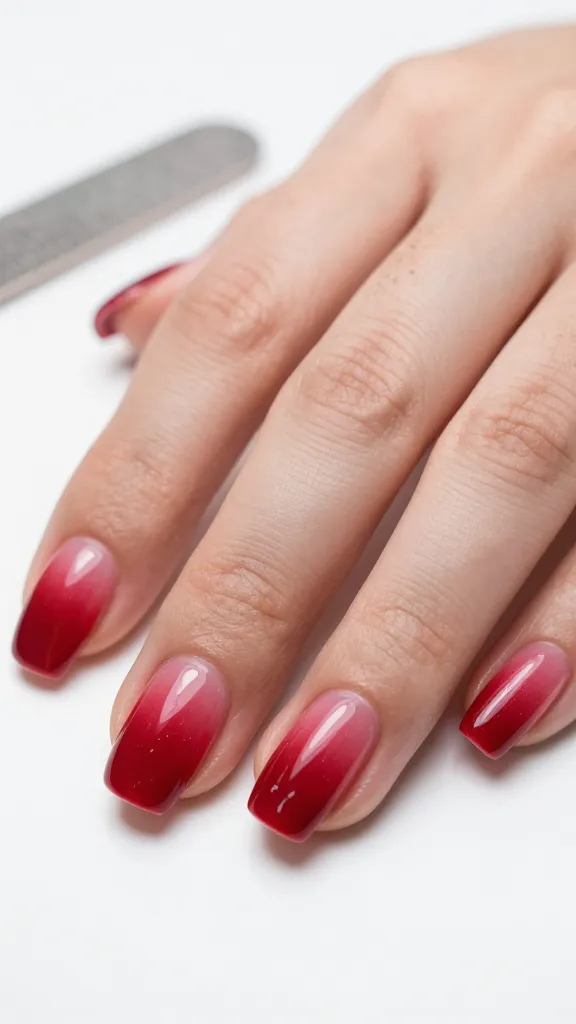
Ombré isn’t dead; it’s evolved into a sultry red gradient with a shimmering top coat. This one looks professional but is surprisingly forgiving for beginners.
What to do
- Base coat of deep ruby red fading to a lighter red
- Soft sponge technique to blend the gradient
- Clear or subtle shimmer on top to catch the light
Tip: practice the sponge dabbing on a plastic nail sheet before you go near your nails. It’s cheaper to fix a practice run than a salon-level redo on your real nails. Trust me.
Want a quick recap? Here’s the vibe check for each design:
– Classic Ruby With a Modern Twist: timeless, clean lines
– Ruby Red with Gold Accents: luxe and glam
– Matte Ruby with Gloss Pop: modern contrast
– Velvet Cherry: textured depth
– Minimalist Ruby with Bold Tips: chic and graphic
– Ruby Red Ombré Glow: soft, radiant gradient
When should you wear these? Any time your calendar has a “you deserve a little sparkle” moment. Work-friendly options lean toward the classic and minimalist sides, while the gold, velvet, and ombré looks scream weekend energy.
If you’re debating DIY vs. salon: DIY is totally doable for the first five designs with a good gel kit and steady hands. A pro might be worth it for the velvet texture or a flawless ombré, but you can nail the rest with practice and patience. Seriously, you’ve got this.
And hey—don’t stress about perfection. Nail art is about having fun and expressing your vibe. If a line isn’t perfectly straight, you can claim it’s a deliberate edgy detail—confidence sells!
So which ruby red design are you trying first? Pick one, grab your tools, and go for it. Your nails will thank you, and your Instagram followers will probably DM you compliments in all caps.


