
Ready to transform your vibe with a chic, self-cut A line bob? These steps are simple, doable, and totally beginner-friendly. You’ll save time, money, and you’ll finally stop arguing with your mirror about bangs that won’t cooperate.
1. Prep Like a Pro: Gather Gear and Set Your Stage

Getting the right tools is half the battle. Without the right setup, you’ll end up with uneven lines and a dramatic IT’S-TIME-TO-RESTART moment.
What You’ll Need
- Quality hair-cutting shears (not kitchen scissors)
- Fine-tooth comb and spray bottle
- Sectioning clips and a mirror you trust
- Shampoo, conditioner, and a towel you don’t mind splurging on
FYI, good tools make results feel instantly more professional. Create a clean, well-lit area so you can actually see every angle as you cut.
2. Decide the Length and Create a Subtle Guideline
Length planning is where confidence starts. You don’t want a surprise “shorter than a bob” moment when you rinse your hair.
Start with a conservative length and elevate gradually. A subtle guideline helps you keep the shape balanced across both sides.
How to Establish the Guideline
- Part hair in the middle or slightly off-center for symmetry
- Combing straight down from the crown, decide where the back will sit
- Use a diagonal-forward section at the front to create the A line effect
When in doubt, remember: you can always snip more, but you can’t uncut hair. Trust me on this one.
3. Create the A Line Shape: Elevate the Back for Flair

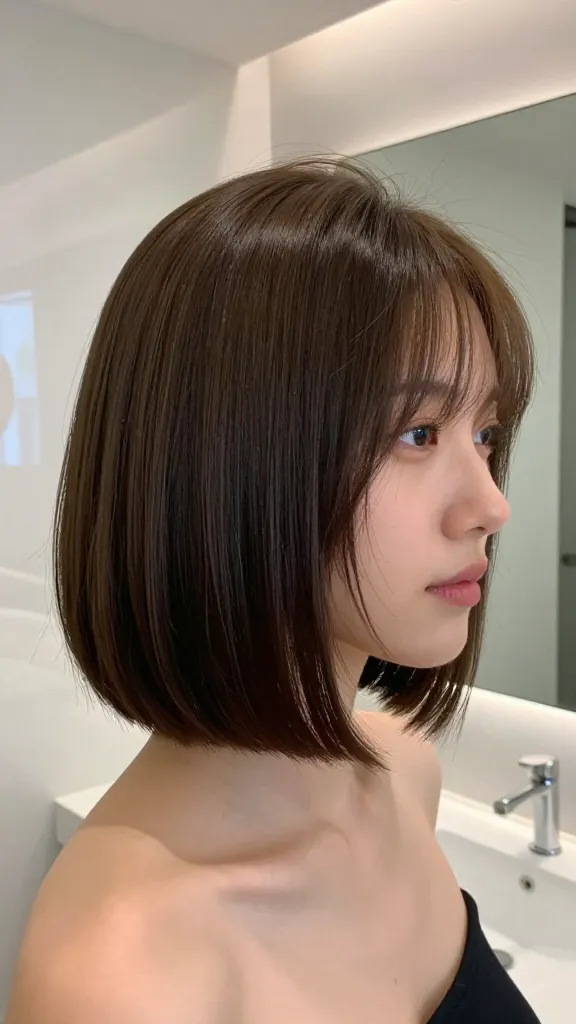
The hallmark of an A line bob is the shorter back with a longer front. It’s iconic, flattering, and surprisingly easy once you set the base.
Execution Steps
- Section hair into four quadrants: crown, sides, nape, and back
- Work from the nape up, keeping the back’s length slightly shorter
- Use a vertical wedge cut in the back to avoid chunky lines
End result? A silhouette that tapers gracefully from nape to chin, like it was born that way. Seriously, it looks effortlessly polished.
4. Texturize for Movement: Break Up the Heavy Feel

Pure blunt lines can read boxy. You want soft texture to let the cut breathe and catch light the right way.
Texture is your best friend here. It adds movement, minimizes visible mistakes, and makes styling easier.
Texture Techniques
- Point-cutting with slight angles to soften edges
- Light layers at the crown to lift the shape
- Vertical point cuts near the ends for a natural fade
Want extra lift around the face? Texturize right where your cheekbones pop. The camera loves that.
5. Front-Framing Perfection: Master the Face-Framing Layers

The allure of an A line bob is how the front pieces frame your face without stealing the show from your eyes. It’s all about the right balance.
Face-Framing Tips
- Take a small diagonal section from the temple and cut toward the outer cheekbone
- Ensure the front length matches or is slightly longer than your middle section
- Keep the front edges slightly rounded for a softer silhouette
Use a handheld mirror to check both sides. Even small discrepancies become obvious when you’re looking straight on.
6. Final Pass: Clean Up, Check, and Set the Look

Rounding out the cut is all about precision and reassurance. A crisp finish ties the whole thing together.
Do a final pass with the shears only at the ends to refine any wispy spots. Then mist with water, comb through, and dry to see the finished shape in real life.
Finishing Touches
- Apply a lightweight smoothing product for shine without weighing down
- Blow-dry with a brush to enhance the A line tilt
- Use a tiny amount of serum on the ends for protection and glow
Bonus: if your ends look a bit blunt, a quick curl at the front can soften the whole look and add personality. Trust me, you’ll thank yourself later.
With these six steps, you’ll nail an A line bob at home that looks stylish, balanced, and professionally cut. If you’re not totally thrilled at first glance, you can always refine the length or texture in a single follow-up trim.
So, are you ready to give it a go and surprise yourself with how easy this is? You’ve got this—FYI, you’ll probably get compliments you didn’t expect. Seriously, you’ll love how low-effort and high-reward this is.


