Introduction: Why Smokey Eyes Are the Ultimate Classic
Ever notice how a good smokey eye instantly makes you feel like you could walk into a Hollywood premiere, even if you’re just heading to brunch? Yeah, that’s the power of this bold, dramatic, and timeless makeup look. I’ve been obsessed with smokey eyes for years because they instantly elevate any look without needing a ton of effort—well, as long as you know the steps, of course.
I remember my first attempt… let’s just say, my eyeliner ended up somewhere near my eyebrow, and I looked more raccoon than glam 😅. Since then, I’ve mastered the art, and today I want to share everything you need to create a smokey eye that’s elegant, sultry, and actually wearable.
Whether you’re prepping for a night out, a fancy date, or just want to practice a killer Instagram selfie, this guide has your back.
What Makes a Smokey Eye So Timeless?
A smokey eye is all about depth, drama, and smudged perfection. Unlike a sharp cat-eye or a glitter-heavy look, a smokey eye:
- Enhances your eye shape naturally.
- Works with any color palette, from classic black to chocolate browns, navy, or even emerald.
- Transitions seamlessly from day to night with minor tweaks.
Ever wondered why makeup artists still use it decades later? Because it’s effortlessly flattering and never goes out of style.
Step 1: Prepping Your Canvas
Clean and Prime
Before you even touch eyeshadow, make sure your eyelids are clean and hydrated. I like using a lightweight eye cream to prevent any creasing later. Then, apply an eye primer to make your shadows pop and last longer. Honestly, skipping primer is like making a cake without flour—you might get away with it, but it’s risky.
Base Shadow
Start with a neutral base shade close to your skin tone. This smooths out the lid and helps the darker colors blend effortlessly. FYI, it also prevents patchiness, which is the arch-nemesis of every smokey eye enthusiast.
Step 2: Choosing the Right Colors
Classic Smokey Palette
You really can’t go wrong with black, gray, and charcoal tones for that iconic smokey eye. If you want something softer, try warm browns or bronzes. My personal favorite is a combination of:
- Matte taupe in the crease.
- Deep charcoal on the outer corner.
- Soft shimmer on the center lid to catch light.
Playing with Color
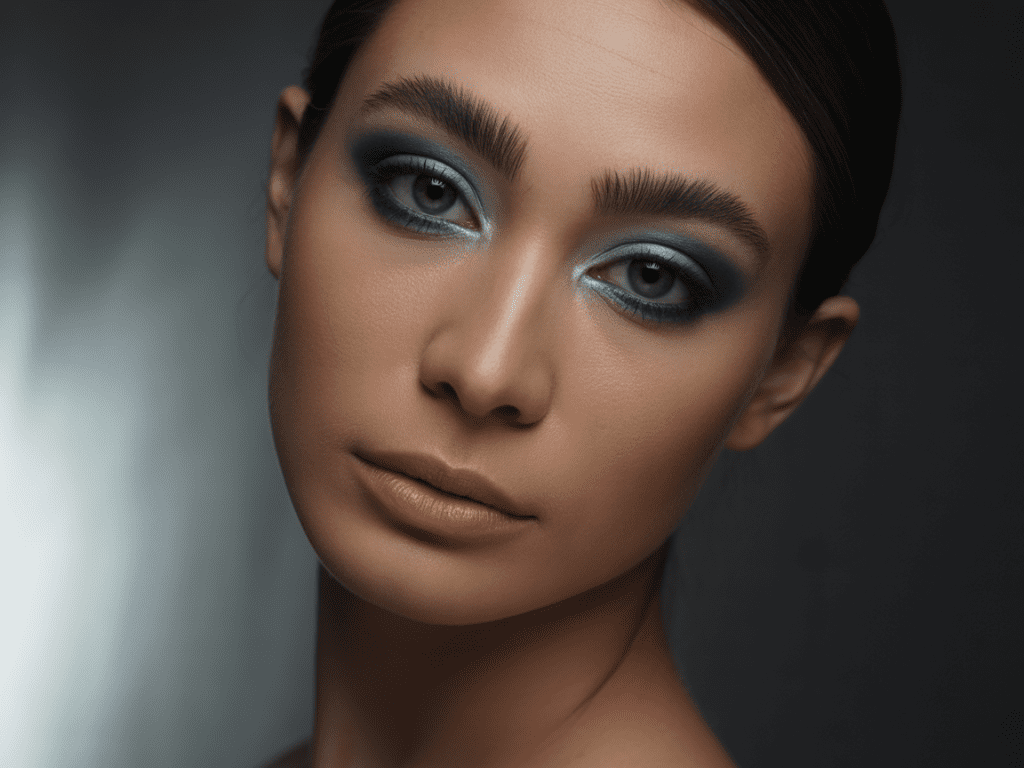
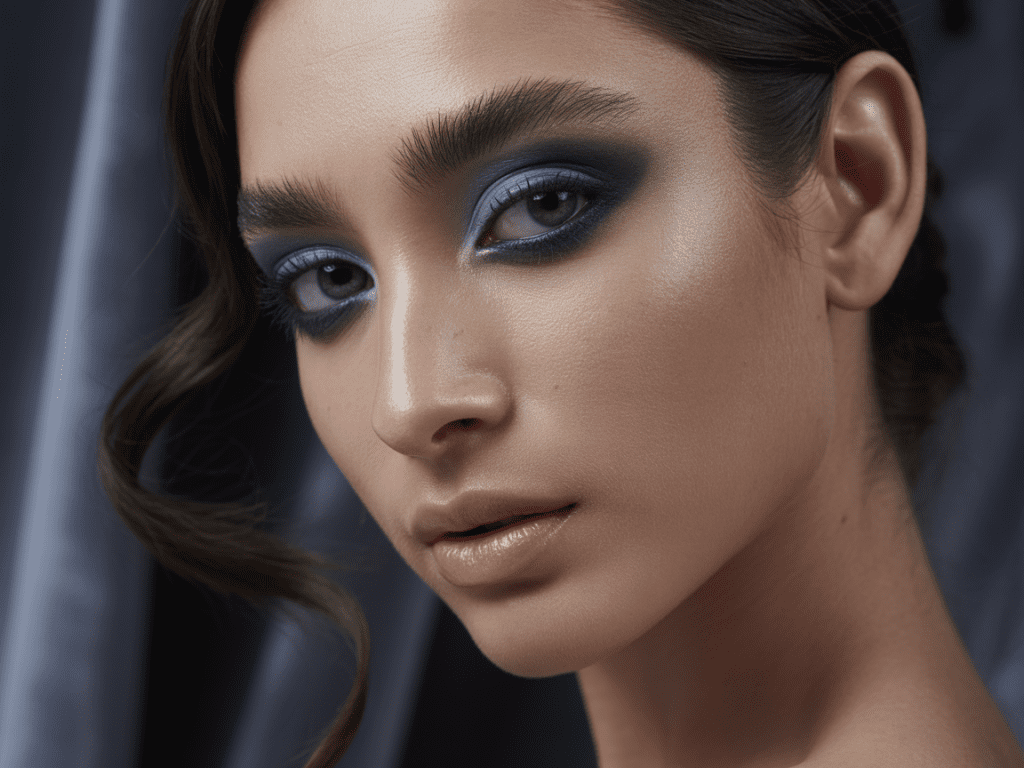
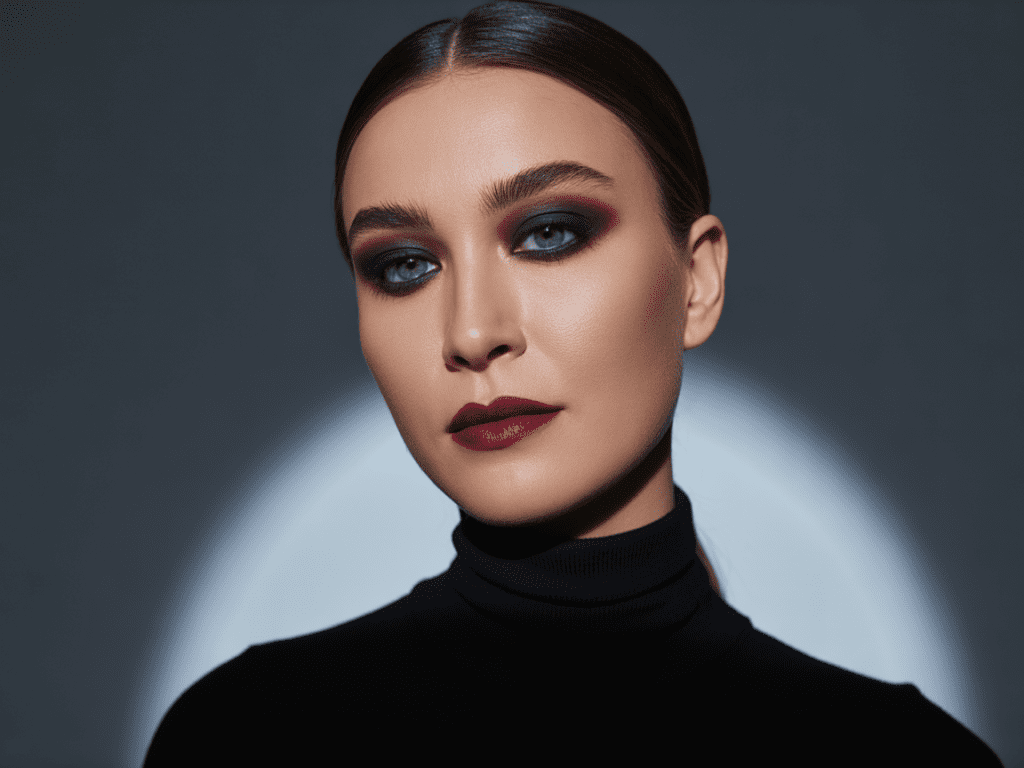
Don’t feel boxed in by tradition. Smokey eyes look amazing in navy, plum, or emerald—just make sure the dark shade is concentrated on the outer V and blended inward.
Step 3: The Art of Blending
Tools Matter
You can’t fake blending. Trust me, I’ve tried. Use a fluffy crease brush and take your time. Circular motions are your friend here. And yes, sometimes more blending is better—your shadows should transition seamlessly without harsh lines.
Layering Shadows
Think of your smokey eye like building a house:
- Start light in the crease.
- Add depth to the outer corner.
- Layer until satisfied—less is more at first, more is more if you want drama.
Ever noticed some people’s smokey eyes look muddy? That’s usually too much product at once without blending. Slow and steady wins the glam race.
Step 4: Liner That Packs a Punch
Upper Lash Line
For a bold smokey eye, line your upper lashes with black or dark brown pencil eyeliner. Don’t stress perfection—the slightly smudged look is intentional and adds to the drama.
Lower Lash Line
Line the lower lash line lightly and smudge it out with a brush or cotton swab. This completes the smokey effect without looking overdone.
Optional Wing
If you want to add extra edge, a subtle wing works beautifully. Keep it soft; sharp wings aren’t really part of the classic smokey aesthetic.
Step 5: Lashes That Wow
Mascara Magic
Use a volumizing mascara to make your eyes pop. Focus on the roots for maximum lift and flutter.
False Lashes? Totally Optional
If you’re feeling extra, natural-looking false lashes add depth. Personally, I only wear them for nights out because I like keeping the look wearable during the day. But honestly, a good mascara can do 80% of the work.
Step 6: Highlight and Inner Corner Glow
Adding a touch of shimmer in the inner corners and under the brow bone gives your eyes dimension and prevents them from looking too dark or heavy. I swear, it makes your eyes look wider and brighter instantly.
Step 7: Perfecting the Rest of Your Face
A smokey eye is already dramatic, so the rest of your makeup should balance it out.
- Foundation: Medium coverage is enough; don’t mask your natural glow.
- Blush: Soft pink or peach; nothing overpowering.
- Highlight: On cheekbones, nose bridge, and cupid’s bow.
- Lips: Neutral or nude shades are safest. Bold lips can work, but IMO, keep it balanced unless you’re going full glam.
Common Smokey Eye Mistakes (And How to Avoid Them)
- Skipping primer – Shadows fade and crease without a good base.
- Overloading product – Too much pigment at once = muddy disaster.
- Harsh lines – Always blend, blend, blend.
- Ignoring your eye shape – Smokey eyes should enhance, not flatten, your features.
Pro tip: If you make a mistake, use a Q-tip dipped in makeup remover to clean edges and then blend again. Mistakes are fixable, promise!
Quick Smokey Eye Routine for Beginners
For those “I want drama but I’m lazy” days:
- Neutral base shade over the lid.
- Medium dark shadow in crease and outer corner.
- Smudge liner along upper and lower lash line.
- Blend like your life depends on it.
- Mascara. Done.
Under 10 minutes, and you still look like you spent an hour in front of the mirror.
My Favorite Products for a Smokey Eye That Slays
I’ve tested a million products, and here’s what I keep coming back to:
- Eyeshadow Palette: Urban Decay Naked Smoky Palette – pigmented, easy to blend.
- Eyeliner: Marc Jacobs Highliner Gel Pencil – smooth and smudgeable.
- Mascara: Too Faced Better Than Sex – lashes that speak louder than words.
- Brushes: Sigma E40 (crease) + E25 (blending). Seriously, tools matter.
- Shimmer Touch: Stila Glitter & Glow Liquid Eyeshadow – tiny dab on lid, major wow.
Why Smokey Eyes Will Never Go Out of Style
Here’s the truth: a well-executed smokey eye is timeless, versatile, and always elegant. Whether paired with nude lips for a casual evening or bold lips for full-on drama, it adapts to any occasion.
It’s dramatic without being overdone, sultry without being gaudy, and classic without being boring. Honestly, if you master one makeup technique in your life, let it be this one.
Extra Tips to Elevate Your Smokey Eye
- Use a setting spray: Keeps everything intact for hours.
- Experiment with colors: Navy or plum smokey eyes are surprisingly flattering.
- Highlight your waterline: Nude pencil makes eyes appear bigger.
- Keep tools clean: Dirty brushes = muddy shadows. Trust me, it matters.
Ever wondered why some smokey eyes look effortless while yours look like a mess? These little tweaks make all the difference.
Conclusion: Your Ultimate Smokey Eye Game Plan
So there you have it—a complete guide to creating a bold, dramatic, and timeless smokey eye. From prepping your lids to choosing shades, blending like a pro, and finishing with lashes and glow, you now have all the tools to rock this classic look.
Remember: practice makes perfect. Don’t beat yourself up if your first few attempts are… a little, well, smoky in the wrong way. Each try teaches you more about what works for your eye shape, skin tone, and personal style.
Next time you’re in front of the mirror, just smile, grab your brushes, and embrace the drama. Smokey eyes aren’t just makeup—they’re confidence you can wear on your face. And honestly? Once you master this, you’ll probably never go back to basic eyeliner again. 😏

Goddvenus Lash Clusters Kit Wispy Eyelash Clusters Lashes Natural DIY Lash Extension Kit 10-16mm Cluster Eyelash Extensions Kit 300pcs C Curl Individual Lashes Cluster Eyelash (No Tweezers)
$14.99 (as of December 10, 2025 14:37 GMT +00:00 - More infoProduct prices and availability are accurate as of the date/time indicated and are subject to change. Any price and availability information displayed on [relevant Amazon Site(s), as applicable] at the time of purchase will apply to the purchase of this product.)