Achieving beautiful, long-lasting gel nail extensions is now easier than ever, thanks to the convenience of at-home kits.
With DIY gel nail extensions, you can enjoy salon-quality results without the hefty price tag or time-consuming visits to the salon.
At-home gel nail kits provide everything you need to create stunning nail extensions in the comfort of your own home.
By following the simple instructions and using the right tools, you can achieve professional-looking results that last.
Key Takeaways
- At-home gel nail kits offer a convenient and cost-effective solution.
- DIY gel nail extensions can be achieved with simple instructions.
- Salon-quality results are possible without visiting a salon.
- At-home kits provide all necessary tools for the job.
- Long-lasting nail extensions can be achieved with the right techniques.
The Rise of DIY Gel Nail Extensions
DIY gel nail extensions are becoming increasingly popular as people seek cost-effective alternatives to salon services. With the rise of at-home nail kits, achieving professional-looking gel nail extensions has never been more accessible.
Why Home Gel Extensions Are Becoming Popular
The convenience of applying gel nail extensions at home is a significant factor in their growing popularity. At-home kits offer users the flexibility to achieve salon-quality nails without the need for frequent salon visits.
According to a recent survey, over 70% of nail enthusiasts prefer DIY nail solutions due to their cost-effectiveness and the ability to customize nail art at home.
Cost Comparison: Salon vs. DIY
One of the primary reasons DIY gel nail extensions are gaining traction is their cost-effectiveness. Let’s compare the costs:
| Service | Salon Cost | DIY Cost |
|---|---|---|
| Gel Nail Application | $50-$100 | $20-$50 |
| Gel Nail Removal | $15-$30 | $5-$10 |
| Total Cost (Application + Removal) | $65-$130 | $25-$60 |
What to Expect When Starting Out
When starting out with DIY gel nail extensions, it’s essential to be patient and prepared for a learning curve. As
“The key to successful DIY nail applications is practice and patience.”
Many users have reported that it takes a few attempts to achieve the desired results.
To get started, you’ll need to invest in a quality at-home nail kit and follow online tutorials or guides for application tips.
Understanding Different Gel Nails Extensions Systems
Understanding the different gel nail extension systems is crucial for achieving professional-looking results at home. The variety of systems available can be overwhelming, but knowing the characteristics of each can help you make an informed decision.
Hard Gel vs. Soft Gel Extensions
Hard gel extensions are known for their durability and strength, making them ideal for those seeking long-lasting nail enhancements. They are more rigid and can be used to create a variety of nail shapes. On the other hand, soft gel extensions are more flexible and offer a more natural look and feel. They are less damaging to the natural nail and are often preferred for their ease of application.
The choice between hard gel and soft gel extensions depends on your personal preference, lifestyle, and the desired outcome. While hard gel provides more structure, soft gel offers flexibility and a more natural appearance.
Poly Gel and Dual Forms
Poly gel is a relatively new entrant in the gel nail extension market, offering a hybrid solution that combines the benefits of hard and soft gels. It is known for its versatility, durability, and ease of shaping. Dual forms, on the other hand, are pre-shaped nail forms that can be applied using gel or poly gel, providing a quick and efficient way to create nail extensions.
Gel-X and Other Pre-Shaped Systems
Gel-X is a popular pre-shaped gel nail extension system that has gained significant attention for its ease of use and high-quality results. Other pre-shaped systems offer similar benefits, allowing users to achieve salon-quality nail extensions at home with minimal effort.
These systems are designed to simplify the application process, making it accessible to both beginners and experienced nail technicians. By understanding the different gel nail extension systems available, you can choose the one that best suits your needs and preferences.
Essential Supplies for Your Home Gel Kit
A well-stocked home gel kit is the foundation of successful DIY gel nail extensions. To achieve professional-looking results, it’s crucial to have the right tools and products.
Basic Tools and Equipment
To start, you’ll need some basic tools and equipment. These include a UV or LED lamp, nail cleanser, lint-free wipes, and nail files. Investing in a good quality lamp is essential, as it will ensure that your gel products cure properly. A nail drill is also a valuable tool, especially for more complex applications.
Quality Gel Products Worth Investing In
When it comes to gel products, quality matters. Look for reputable brands that offer high-quality gel polish, gel top coat, and gel base coat. It’s also worth investing in a good quality gel builder or gel extension product, depending on your needs. These products will help you achieve a durable and long-lasting finish.
Optional Items That Make Application Easier
There are several optional items that can make the application process easier. These include nail forms or tips, gel brushes, and dusters. Nail forms or tips are essential for creating gel nail extensions, while gel brushes can help you achieve a smooth, even application. Dusters can be used to remove dust and debris from the nail surface.
By investing in these essential supplies, you’ll be well on your way to creating beautiful, salon-quality gel nail extensions at home.
Preparing Your Natural Nails Properly
Proper nail preparation is the foundation of a successful gel nail extension application. A well-prepared nail ensures a strong bond between your natural nail and the gel extension, leading to a longer-lasting and more durable finish.
Nail Cleaning and Sanitizing
The first step in preparing your natural nails is to clean and sanitize them thoroughly. Use a nail cleanser to remove any oils or residue from your nails. This step is crucial as it helps the gel products adhere better to your nail.
- Use a lint-free wipe to clean the nail surface.
- Sanitize your tools and work area to prevent contamination.
Cuticle Care and Nail Plate Preparation
Next, focus on cuticle care and nail plate preparation. Gently push back your cuticles using a cuticle pusher, and trim any excess cuticle if necessary. Then, use a nail buffer to gently buff the surface of your nail, creating a rough texture for the gel to adhere to.

Applying Primers and Bonders
Finally, apply a nail primer to dehydrate the nail and promote adhesion. Some nail technicians also use a bonder after applying the primer to further enhance the bonding between the nail and the gel extension.
By following these steps, you’ll be able to achieve a strong and long-lasting gel nail extension that looks and feels great.
Step-by-Step Application Process
Mastering the art of gel nail application requires patience, the right tools, and a step-by-step approach. To achieve professional-looking gel nail extensions at home, follow this detailed guide.
Choosing and Applying Nail Forms or Tips
The first step in applying gel nail extensions is selecting the appropriate nail form or tip. Nail forms are ideal for creating a more natural look, as they allow for greater customization. To apply nail forms, start by selecting the correct size and shape for each nail. Apply a small amount of gel adhesive to the form and press it onto your natural nail, ensuring proper alignment.
For those using nail tips, apply a small amount of glue to the tip and attach it to the end of your natural nail, holding it in place for a few seconds until it sets.
Building the Extension Structure
Once the nail form or tip is in place, it’s time to build the extension structure. Start by applying a thin layer of gel builder to the nail, making sure to cover the entire surface. Use a nail brush to shape and smooth the gel, creating the desired shape.
For a more durable extension, apply multiple thin layers of gel, curing each layer under the UV or LED lamp according to the manufacturer’s instructions.
Curing Times and Techniques
Proper curing is crucial for a long-lasting gel nail extension. The curing time will depend on the type of lamp you’re using (UV or LED) and the gel product’s specifications. Generally, LED lamps cure faster than UV lamps.
- LED Lamp: 30 seconds to 1 minute per layer
- UV Lamp: 2-3 minutes per layer
Common Mistakes to Avoid
To ensure a successful gel nail application, avoid the following common mistakes:
| Mistake | Consequence | Solution |
|---|---|---|
| Insufficient curing | Weak adhesion, lifting | Follow recommended curing times |
| Overfilling | Uneven surface, discomfort | Use a nail brush to shape and smooth |
| Poor nail preparation | Lifting, poor adhesion | Clean and prep the nail surface properly |
By following these steps and avoiding common mistakes, you can achieve beautiful, long-lasting gel nail extensions at home.
Shaping and Filing for Professional Results
Achieving a salon-quality finish with gel nail extensions requires mastering the art of nail shaping and filing. The shape and finish of your gel nail extensions can make or break the overall look, making it essential to get these steps right.
Popular Nail Shapes and How to Achieve Them
Different nail shapes can dramatically change the appearance of your gel nail extensions. Popular shapes include oval, almond, and square. To achieve these shapes, it’s crucial to understand the techniques involved. For instance, creating an oval shape requires careful filing to ensure symmetry, while a square shape demands precision to avoid uneven edges.
E-File vs. Hand Filing Techniques
Both e-file and hand filing have their advantages. E-filing is faster and can be more precise, especially for intricate designs. Hand filing, on the other hand, offers more control for shaping and can be gentler on the nail. Understanding when to use each technique is key to achieving a professional finish.
Creating a Smooth, Salon-Quality Finish
To achieve a smooth finish, it’s essential to file in one direction only, from the cuticle to the tip of the nail, to avoid damaging the nail or causing lifting. Using a fine-grit file and buffing the nail surface can also help to create a high-gloss finish that rivals salon-quality nails.
Gel Polish Application and Nail Art
With the right tools and a bit of practice, you can master gel polish application and take your nail art to the next level. Gel polish offers a long-lasting, high-shine finish that’s hard to achieve with traditional nail polish.
Base and Color Application Tips
Start with a clean and prepared nail surface. Apply a thin layer of base coat to protect your nails and promote gel polish adhesion. When applying color, use thin coats, allowing each layer to cure completely before adding the next. This helps prevent pooling and ensures an even finish.
For a professional-looking finish, make sure to wipe off the sticky layer after curing the top coat to prevent residue buildup.
Beginner-Friendly Nail Art Techniques
Nail art can seem intimidating, but starting with simple designs can lead to beautiful results. Try using nail guides or stickers to create crisp lines and patterns. For a more intricate look, experiment with dotting tools or nail art brushes.
- Striping tape for straight lines
- Dotting tools for polka dots
- Nail art brushes for detailed designs
Sealing and Protecting Your Design
Once you’ve applied your gel polish and nail art, seal it with a high-quality top coat. This not only adds shine but also protects your design from chipping and fading. To extend the life of your gel polish, wear gloves when doing household chores and apply cuticle oil regularly.
By following these tips and practicing regularly, you can achieve salon-quality gel polish finishes and nail art at home.
Maintaining and Extending the Life of Your Extensions
Proper maintenance is crucial for extending the life of your gel nail extensions. With the right care and attention, you can enjoy your gel nails for a longer period.
Daily Care and Protection
To keep your gel nail extensions in good condition, it’s essential to practice daily care. This includes:
- Keeping your nails dry to prevent lifting
- Avoiding harsh chemicals that can damage the gel
- Wearing gloves when doing household chores
- Using a nail brush to clean under your nails
Regular moisturizing around your cuticles and nail bed is also vital to maintain healthy nail growth.
Performing Fill-Ins at Home
Fill-ins are necessary to maintain the appearance of your gel nail extensions. You can perform fill-ins at home by:
- Preparing your nail surface
- Applying a gel fill-in product
- Curing the gel according to the manufacturer’s instructions
When to Start Fresh vs. When to Maintain
Knowing when to maintain or start fresh with new gel nail extensions is important. If you notice significant lifting or damage, it might be time for a new application. However, for minor issues, a fill-in can be sufficient.
By following these gel nail maintenance tips, you can extend the life of your extensions and keep them looking their best.
Troubleshooting and Fixing Common Problems
Common issues with gel nail extensions, such as lifting and bubbles, can be addressed with the right techniques. Even with proper application, gel nail extensions can sometimes develop problems that need to be fixed. Understanding how to troubleshoot these issues is key to maintaining your nail extensions.
Addressing Lifting and Adhesion Issues
Lifting is often caused by poor adhesion between the natural nail and the gel extension. To fix this, gently file the lifted area to remove any loose gel, then clean and reapply a bonding agent before reattaching the gel.
As expert nail technicians advise, “Proper preparation of the natural nail is crucial for preventing lifting.”
Fixing Bubbles and Cloudiness
Bubbles and cloudiness can occur due to improper curing or contamination during application. To fix bubbles, carefully drill out the affected area, clean, and reapply gel. Cloudiness can often be resolved by buffing the surface gently.
Repairing Breaks and Cracks
For breaks or cracks, use a gel repair technique by applying a small amount of gel to the damaged area, shaping, and curing. For more significant damage, consider using a gel wrap or tip.
Preventing Future Problems
To prevent future issues, maintain good nail hygiene, avoid using your nails as tools, and attend regular fill-ins. As a simple maintenance routine can significantly extend the life of your gel nail extensions.
By following these troubleshooting tips, you can enjoy long-lasting, salon-quality gel nail extensions at home. Regular care and attention will help prevent common problems, ensuring your nails always look their best.
“The key to long-lasting gel nail extensions is not just in the application, but in the ongoing care and maintenance.”
Conclusion: Enjoying Your Professional-Looking Nails
With the right knowledge and tools, achieving professional-looking gel nail extensions at home is now within your reach. By following the steps outlined in this article, you can create salon-quality nails that enhance your beauty and confidence.
At-home nail care has become increasingly popular, and with the tips provided, you can join the ranks of those enjoying beautiful, long-lasting gel nail extensions without the need for frequent salon visits. Whether you’re a beginner or an experienced nail enthusiast, the techniques and products discussed will help you achieve the look you desire.
As you continue to practice and refine your skills, you’ll find that maintaining your gel nail extensions becomes easier, allowing you to enjoy your professional-looking nails for longer. So, take the first step towards beautiful, at-home nail care and start creating the nail look you’ve always wanted.
FAQ
What is the difference between hard gel and soft gel extensions?
Hard gel extensions are more rigid and provide a stronger, more durable nail enhancement, while soft gel extensions are more flexible and offer a more natural look and feel.
How do I choose the right nail shape for my gel nail extensions?
Popular nail shapes include oval, almond, and square. To choose the right shape, consider your personal style, nail bed, and the shape of your fingers.
What are the benefits of using a gel nail extension kit at home?
Using a gel nail extension kit at home can save you money, allow for more flexibility and creativity, and provide a salon-quality finish in the comfort of your own home.
How do I prevent lifting and adhesion issues with my gel nail extensions?
To prevent lifting and adhesion issues, ensure your natural nails are properly prepared, use a high-quality gel adhesive, and follow the manufacturer’s instructions for application and curing times.
Can I reuse my gel nail extension tips or forms?
It’s generally not recommended to reuse gel nail extension tips or forms, as they can be damaged or compromised during the removal process, which can lead to a poor fit or adhesion issues.
How often should I perform fill-ins on my gel nail extensions?
The frequency of fill-ins depends on the growth of your natural nails and the condition of your gel nail extensions. Typically, fill-ins are needed every 2-3 weeks to maintain a seamless and polished look.
What is the best way to remove gel nail extensions at home?
To remove gel nail extensions at home, use a gel nail remover, wrap your fingers in cotton pads soaked in the remover, and gently scrape off the gel with a cuticle pusher or orange stick.
How can I achieve a smooth, salon-quality finish with my gel nail extensions?
To achieve a smooth finish, use a high-quality gel polish, follow proper application and curing techniques, and finish with a top coat to seal and protect your design.
What are some common mistakes to avoid when applying gel nail extensions?
Common mistakes to avoid include improper nail preparation, using too much or too little gel adhesive, and not following the manufacturer’s instructions for application and curing times.
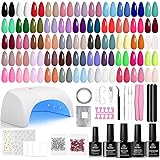
Beetles Gel Nail Polish Kit with U V Light - 80Pcs Color Enchantment 55 Colors Gel Polish Starter Kit with Base Top Coat DIY Nails Supply Stickers Manicure Tools Christmas Gift for Women Teens Girls
$23.99 (as of December 11, 2025 09:38 GMT +00:00 - More infoProduct prices and availability are accurate as of the date/time indicated and are subject to change. Any price and availability information displayed on [relevant Amazon Site(s), as applicable] at the time of purchase will apply to the purchase of this product.)