Achieving salon-quality nails from the comfort of your own home is now easier than ever with DIY builder gel nails. This innovative nail solution allows you to enhance your natural nail beauty without the need for frequent salon visits.
At-home builder gel nails offer a convenient and cost-effective way to enjoy long-lasting, gorgeous nails. With the right techniques and products, you can create a professional-looking finish that rivals salon-quality nails.
Key Takeaways
- Learn how to achieve salon-quality nails at home with DIY builder gel nails.
- Discover the benefits of using builder gel nails for a long-lasting finish.
- Explore the convenience and cost-effectiveness of at-home nail care.
- Understand the importance of proper techniques and product selection.
- Get tips on creating a professional-looking finish with builder gel nails.
Understanding Builder Gel Nails
Builder gel nails have revolutionized the nail care industry with their durability and versatility. Builder gel nail application is a technique that has gained popularity for its ability to create long-lasting, high-gloss nails.
The Science Behind Builder Gel
Builder gel is a type of gel polish that is thicker and more durable than regular gel polish. It is designed to provide a strong foundation for nail enhancements. The science behind builder gel lies in its unique formula, which is made up of a mixture of monomers and polymers that create a strong, flexible film when cured under a UV or LED lamp.
Differences Between Builder Gel and Regular Gel Polish
The main difference between builder gel and regular gel polish is its thickness and durability. Builder gel is much thicker and more durable, making it ideal for nail enhancements and repairs. Regular gel polish, on the other hand, is thinner and more prone to chipping. Here’s a comparison table:
| Characteristics | Builder Gel | Regular Gel Polish |
|---|---|---|
| Thickness | Thicker | Thinner |
| Durability | More durable | Less durable |
| Usage | Nail enhancements and repairs | Nail coloring |
Benefits of Builder Gel for Nail Enhancement
Builder gel offers several benefits for nail enhancement, including its ability to provide a strong, durable foundation for nails. It is also highly versatile, allowing for a range of nail art designs and techniques. According to nail care experts, “Builder gel is a game-changer for those looking to achieve long-lasting, salon-quality nails at home.”
“Builder gel is a game-changer for those looking to achieve long-lasting, salon-quality nails at home.”
Nail Care Expert
The benefits of builder gel for nail enhancement include increased durability, versatility in design, and ease of application. With these advantages, it’s no wonder that builder gel has become a popular choice among nail enthusiasts.
Essential Supplies for DIY Builder Gel Nails
To achieve salon-quality builder gel nails at home, it’s crucial to have the right supplies. A well-prepared nail station with the necessary tools and materials will make the application process smoother and more efficient.
Investing in a comprehensive builder gel nail kit is a great starting point. These kits usually include a variety of products and tools to help you get started.
UV/LED Lamp Options
A good quality UV/LED lamp is essential for curing gel polish. When choosing a lamp, consider the size, power, and type of bulbs it uses. A 36W or 48W lamp is typically sufficient for home use.
Popular UV/LED Lamp Features:
- Timer function for precise curing times
- Multiple curing modes (e.g., UV, LED, or combo)
- Compact design for easy storage
Types of Builder Gels to Consider
Builder gels come in various types, each with its own benefits. Some popular options include:
| Type of Builder Gel | Description | Best For |
|---|---|---|
| Clear Builder Gel | Transparent gel for building nail shape | Nail strengthening, nail extension |
| Colored Builder Gel | Pigmented gel for color and structure | One-step color and build application |
| Strengthening Builder Gel | Gel infused with strengthening agents | Weak or brittle nails |
Additional Tools for Professional Results
To achieve professional-looking results, you’ll need a few additional tools. These include:
- Nail files and buffers for shaping and smoothing
- Cuticle pushers and nippers for cuticle care
- Nail cleansers and primers for preparation
By having the right supplies and understanding how to use them, you’ll be well on your way to creating beautiful builder gel nails at home.
Preparing Your Natural Nails
Preparing your natural nails is a critical step that ensures a long-lasting builder gel manicure. A well-prepared nail surface allows for better adhesion of the builder gel, reducing the risk of lifting or cracking.
Proper Nail Cleaning and Sanitizing
Start by cleaning your nails with a gentle nail cleanser to remove any oils or residue. Sanitizing your nails is crucial to prevent any infections. Use a lint-free wipe soaked in a nail sanitizer to wipe down each nail.
Filing and Shaping Techniques
Use a nail file to gently shape your nails to your desired shape. Be cautious not to file too much, as this can weaken the nail. For a natural look, follow the natural curve of your nail.
Applying Nail Primers and Dehydrators
Apply a nail dehydrator to remove any moisture from the nail surface, followed by a nail primer to enhance adhesion. Nail primers help the builder gel adhere better to the nail, ensuring a longer-lasting manicure.
Step-by-Step Builder Gel Application
Builder gel application is an art that requires precision and patience, but with practice, you can master it. The key to a successful builder gel manicure lies in understanding the step-by-step process involved.
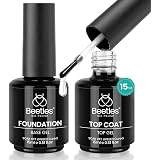
Applying Base Coat Correctly
The foundation of a great builder gel application starts with the base coat. Apply a thin layer to your nail, making sure to cover the entire surface. This layer is crucial as it helps the builder gel adhere to your nail. Cure the base coat under the UV or LED lamp according to the manufacturer’s instructions.
Building the Perfect Apex
The apex is the highest point of your nail, and building it correctly is essential for a natural look and to prevent the nail from becoming too thick. Use a bead of builder gel and gently shape it to form the apex. Make sure it’s not too high or too low, as this can affect the overall appearance and durability of the nail.
Practice makes perfect when it comes to building the apex. Don’t be discouraged if it takes a few attempts to get it right.
Curing Process and Times
Curing is a critical step in the builder gel application process. Follow the curing times recommended by the manufacturer to ensure the gel is properly cured. Under-curing can lead to a weak and brittle nail, while over-curing can cause damage to the nail and surrounding skin.
Adding Multiple Layers for Strength
To achieve strong and durable nails, applying multiple thin layers of builder gel is recommended. Allow each layer to cure before adding the next. This technique helps prevent the gel from becoming too thick and promotes even curing.
By following these steps and practicing your technique, you can achieve professional-looking builder gel nails at home.
Creating Beautiful Builder Gel Nails at Home
Achieving salon-quality builder gel nails at home requires a combination of the right techniques and practice. To start, it’s essential to understand the fundamentals of nail shaping, smoothing, and refining.
Mastering Different Nail Shapes
Mastering different nail shapes is crucial for creating beautiful builder gel nails. The most popular shapes include oval, squoval, and almond. To achieve these shapes, use a nail file to gently shape the nail, starting from the center and working your way outward. Using the right nail file is key to avoiding damage and achieving a smooth finish.
For an oval shape, file the nail in a smooth, continuous motion, curving it slightly at the tip. For a squoval shape, file the nail straight across, with a slight curve at the corners. The almond shape is achieved by filing the nail to a point, with a curved edge.
Smoothing and Refining Techniques
Smoothing and refining are critical steps in creating a flawless builder gel nail finish. After shaping, use a buffer to gently smooth out any ridges or imperfections. This step helps to create a smooth surface for the gel to adhere to.
To refine the nail further, use a fine-grit nail file to gently buff the surface, removing any remaining imperfections. This step is essential for achieving a high-gloss finish.
Common Shaping Mistakes to Avoid
When shaping builder gel nails, there are several common mistakes to avoid. One of the most common errors is filing too aggressively, which can cause damage to the nail. Another mistake is not using the correct nail file, which can lead to uneven edges or ridges.
To avoid these mistakes, use a high-quality nail file and take your time when shaping the nail. It’s also essential to be gentle when filing, as rough handling can cause damage to the nail or surrounding skin.
Finishing Touches for Salon-Quality Results
To achieve salon-quality results with your builder gel nails, it’s essential to focus on the finishing touches. These final steps can make a significant difference in the appearance and longevity of your manicure.

Applying Color Gel Polish
Applying color gel polish is a crucial step in completing your builder gel nail look. Choose a high-quality gel polish that matches your desired color. Apply a thin layer, making sure to cover the entire nail surface. Cure the polish under the UV or LED lamp according to the manufacturer’s instructions.
Adding Nail Art and Embellishments
Nail art and embellishments can elevate your builder gel nails to the next level. Use nail guides or stickers to create intricate designs, or apply rhinestones and other embellishments to add some sparkle. Be creative and have fun with it! Make sure to seal your nail art with a top coat to protect it.
Sealing with Top Coat for Longevity
Applying a top coat is essential for sealing your gel polish and nail art, ensuring a long-lasting finish. Choose a high-quality top coat and apply a thin layer, curing it under the lamp as instructed. This final step will help prevent chipping and fading, keeping your builder gel nails looking great for weeks to come.
By following these finishing touches, you can achieve salon-quality results with your builder gel nails at home. Remember to be patient and take your time to ensure a professional-looking finish.
Maintaining Your Builder Gel Nails
The key to long-lasting builder gel nails lies in proper aftercare and maintenance. By following a few simple steps, you can keep your nails looking their best and extend the life of your manicure.
Weekly Maintenance Tips
To maintain your builder gel nails, it’s essential to perform weekly checks. Inspect your nails for any signs of lifting or damage. Use a lint-free wipe with a small amount of nail cleanser to gently clean around the cuticles and nail bed. This helps prevent the buildup of bacteria and oils that can cause the gel to lift.
Tip: Apply cuticle oil daily to keep your cuticles hydrated and healthy.
When and How to Fill Grown-Out Nails
As your nails grow out, you may need to fill in the gap between your natural nail and the builder gel. Use a builder gel fill kit to carefully fill in the area, following the manufacturer’s instructions. This process helps maintain the appearance of your nails and prevents damage.
- Prep the nail surface by gently buffing the area.
- Apply a small amount of builder gel to the grown-out area.
- Cure the gel according to the product’s instructions.
Protecting Your Builder Gel Manicure
To protect your builder gel manicure, wear gloves when doing household chores or using harsh chemicals. Avoid using your nails as tools, as this can cause damage to the gel and your natural nail.
| Protection Tips | Benefits |
|---|---|
| Wear gloves when washing dishes | Prevents water and detergent damage |
| Avoid using nails as tools | Reduces risk of chipping or cracking |
| Apply top coat regularly | Maintains shine and extends manicure life |
Safe Removal and Nail Health
Safe removal of builder gel nails is essential to prevent damage and promote healthy nail growth. Removing builder gel requires a careful and gentle approach to avoid damaging the natural nail.
Proper Builder Gel Removal Process
The removal process involves several steps. First, you’ll need to gently file the top coat to break the seal. Then, soak a cotton pad in a builder gel remover, place it on the nail, and wrap it with foil. After 10-15 minutes, gently scrape off the gel with a cuticle pusher. Repeat if necessary.

Post-Removal Nail Care
After removing builder gel, it’s crucial to nourish your nails. Apply a moisturizing cuticle oil and nail cream to hydrate the nail and surrounding skin. This helps to repair any damage caused during the removal process.
“Proper aftercare is just as important as the removal process itself. Neglecting post-removal care can lead to dry, brittle nails.”
Taking Breaks Between Applications
Giving your nails a break between builder gel applications allows them to recover and regain strength. It’s recommended to wait at least a few days before reapplying builder gel.
| Benefits of Breaks | Description |
|---|---|
| Nail Recovery | Allows nails to regain strength and health |
| Reduced Damage | Minimizes risk of damage from repeated applications |
| Improved Health | Promotes healthy nail growth and appearance |
Conclusion
With the right techniques and supplies, achieving salon-quality builder gel nails at home is within reach. By following the steps outlined in this article, you can create beautiful, long-lasting nails that enhance your natural beauty.
DIY nail care has never been more accessible, and with builder gel nails, you can enjoy a professional finish without the salon price tag. Whether you’re a seasoned nail enthusiast or just starting out, at home nail application has become a convenient and rewarding experience.
By mastering builder gel nails, you’ll not only save time and money but also have the freedom to experiment with different nail art designs and styles. So, gather your supplies, practice your skills, and get ready to show off your gorgeous builder gel nails.
FAQ
What is builder gel, and how does it differ from regular gel polish?
Builder gel is a type of gel polish that is used to enhance and strengthen natural nails. Unlike regular gel polish, builder gel is thicker and more durable, making it ideal for creating long-lasting, salon-quality nails at home.
What are the benefits of using builder gel for nail enhancement?
Builder gel provides a strong, durable, and long-lasting nail enhancement that can help to strengthen and grow out natural nails. It is also versatile and can be used to create a variety of nail shapes and designs.
What kind of UV/LED lamp is best for curing builder gel?
A high-quality UV/LED lamp that emits a wavelength of 365nm or 405nm is best for curing builder gel. Look for lamps from reputable brands like Melissa or Makartt that offer a range of curing options and timers.
How do I prepare my natural nails for builder gel application?
To prepare your natural nails, clean and sanitize them thoroughly, shape them to your desired shape, and apply a nail primer and dehydrator to help the builder gel adhere.
Can I use builder gel on weak or brittle nails?
Yes, builder gel can be used on weak or brittle nails to help strengthen and fortify them. However, it’s essential to follow proper application and aftercare techniques to ensure the best results.
How often should I fill in my builder gel nails?
It’s recommended to fill in your builder gel nails every two to three weeks to maintain their shape and prevent lifting. Regular fills can also help to prevent damage to your natural nails.
How do I remove builder gel safely?
To remove builder gel safely, wrap a cotton pad soaked in a gel remover around your finger, and let it sit for 10-15 minutes. Then, gently scrape off the gel with a cuticle pusher or orange stick, and moisturize your nails and cuticles.
Can I reuse builder gel that has been previously applied?
No, it’s not recommended to reuse builder gel that has been previously applied, as it can be contaminated with bacteria and other debris, which can cause infections or other nail problems.
How can I prevent lifting or separation of the builder gel from my natural nail?
To prevent lifting or separation, ensure that your natural nails are properly prepared before application, and follow the manufacturer’s instructions for application and curing. Regular aftercare and maintenance can also help to prevent lifting.
Glamnetic Press On Nails - MaDamn | French Tip Nails, UV Finish Short Pointed Almond Shape, Salon Quality Semi-Transparent Nails in 12 Sizes - 24 Nail Kit with Glue
$15.99 (as of October 23, 2025 13:22 GMT +00:00 - More infoProduct prices and availability are accurate as of the date/time indicated and are subject to change. Any price and availability information displayed on [relevant Amazon Site(s), as applicable] at the time of purchase will apply to the purchase of this product.)