Nail designs at home can be fun and creative. You don’t need a salon for beautiful nails.
Creating your own nail designs is a great way to express yourself. With a few tools and some practice, you can achieve professional-looking results right at home. It’s a cost-effective and enjoyable hobby that allows you to experiment with colors, patterns, and techniques.
Whether you’re a beginner or have some experience, there’s always something new to try. In this blog, we’ll explore tips, tricks, and ideas for stunning nail designs. Get ready to unleash your inner artist and make your nails the talk of the town!
Introduction To Diy Nail Designs
Whether you are a beginner or an experienced artist, doing your nails at home can be a satisfying experience. It’s a great way to relax and pamper yourself.
Benefits Of Diy
- Cost-effective: Save money by doing your nails at home.
- Convenience: No need to schedule salon appointments.
- Customization: Create unique designs tailored to your taste.
- Hobby: Turn nail art into a fun and creative hobby.
Essential Tools
To get started with DIY nail designs, you’ll need some basic tools. Here is a list of essential items:
| Tool | Description |
|---|---|
| Nail Polish | Choose a variety of colors for different designs. |
| Nail File | Shape your nails to your desired style. |
| Base Coat | Protects your nails and helps polish last longer. |
| Top Coat | Seals the design and adds shine. |
| Nail Art Brushes | Used for detailed designs and patterns. |
| Dotting Tools | Create dots and other small details. |
| Nail Polish Remover | Correct mistakes and change designs easily. |
Preparing Your Nails
Preparing your nails is a crucial step for achieving beautiful nail designs at home. This process ensures a smooth base, which helps your nail art last longer. Taking the time to properly prepare your nails can make a significant difference in the final result.
GET THE PERFECT MANICURE AT HOME WITH OUR NAIL PRODUCTS >> SHOP NOW <<
Cleaning And Shaping
Start with clean nails. Remove any old polish using a gentle nail polish remover. Wash your hands with soap and water to get rid of any residue.
Next, trim your nails to your desired length using nail clippers. Use a nail file to shape your nails. Aim for a shape that suits your style. Common shapes include square, round, and oval.
File your nails in one direction to avoid splitting. This technique keeps your nails healthy and strong. After shaping, smooth the edges with a buffer for a polished look.
Cuticle Care
Soak your nails in warm water for a few minutes. This softens the cuticles, making them easier to manage.
Gently push back the cuticles using a cuticle pusher. Be careful not to push too hard, as this can damage the nail bed.
Trim any excess cuticle skin with cuticle nippers. Do this step with care to prevent any cuts or infections. Finally, moisturize the cuticles with cuticle oil or hand cream. This keeps them soft and hydrated.
Basic Nail Painting Tips
Creating beautiful nail designs at home can be both fun and rewarding. With the right tips, even beginners can achieve salon-quality results. This section will guide you through basic nail painting tips that will elevate your at-home manicure game.
Choosing The Right Polish
The first step is selecting the right nail polish. Different finishes like matte, glossy, and glitter offer unique looks. Choose a color that complements your skin tone. Light shades like pastels are great for a subtle look. Darker shades like reds and blacks make a bold statement.
Consider the occasion too. For everyday wear, neutral tones are perfect. For special events, go for brighter or more vibrant colors. Quality matters as well. Invest in good brands to ensure a smooth application and longer-lasting wear.
Applying Base And Top Coats
Always start with a base coat. It protects your nails from staining and helps the polish adhere better. A good base coat can also strengthen your nails and prevent chipping.
After applying your chosen polish, finish with a top coat. This adds shine and seals the color. It also prolongs the life of your manicure. Reapply the top coat every few days to maintain the glossy finish and prevent chipping.
Let each layer dry completely before adding the next. This ensures a smooth, even finish. Thin layers dry faster and look better than thick ones.
GET THE PERFECT MANICURE AT HOME WITH OUR NAIL PRODUCTS >> SHOP NOW <<
Simple Nail Art Techniques
Nail art at home can be a fun and creative activity. You don’t need fancy tools or professional skills to make your nails look beautiful. Simple nail art techniques can transform your nails with minimal effort. Let’s explore some easy techniques that you can try at home.
Polka Dots
Polka dots are a classic and easy nail art design. You can use a bobby pin or a toothpick to create the dots. Start with a base color of your choice. Once the base is dry, dip the tip of the bobby pin or toothpick into a contrasting nail polish color. Gently press it onto your nail to make small dots. You can arrange the dots in a pattern or randomly. This design is simple and looks cute on any nail length.
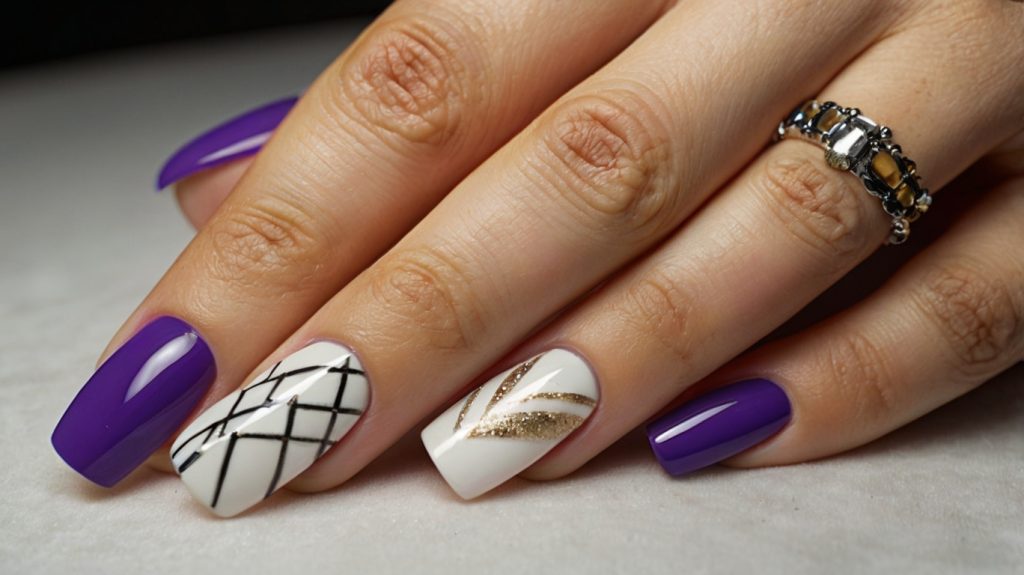
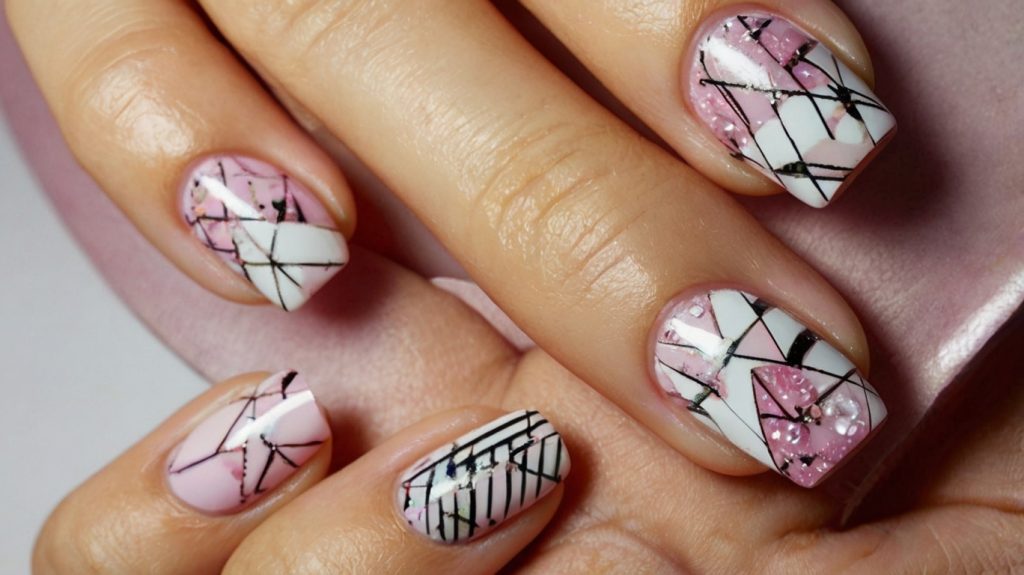
Stripes And Lines
Stripes and lines add a modern touch to your nails. To create straight lines, use nail striping tape or regular tape cut into thin strips. Apply the tape onto your nails after the base coat dries. Paint over the tape with a different color. Once the top color is dry, carefully remove the tape to reveal clean lines. You can experiment with different angles and thicknesses. This technique works well for both bold and subtle designs.
Using Nail Stickers
Creating stunning nail designs at home is easier than ever with nail stickers. They offer a quick way to add intricate patterns and unique designs to your nails without the need for professional help. Nail stickers come in various styles and are perfect for those who want beautiful nails without spending too much time or money.
Types Of Stickers
Nail stickers come in many types. Some of the most popular include 3D stickers, which add texture and depth to your nails. There are also water decals, which require a bit of water to apply but give a smooth finish. Another type is the classic adhesive sticker, which sticks directly to the nail. Each type has its own charm and can help you achieve different looks.
Application Tips
Start with clean, dry nails. This helps the stickers adhere better. Choose a sticker that fits your nail shape and size. Use tweezers to handle the sticker, as this prevents fingerprints. Place the sticker on your nail and press down firmly. Ensure there are no bubbles or wrinkles. Seal the sticker with a clear top coat for durability.
If using water decals, cut out the design first. Soak the decal in water for 10-20 seconds. Slide the decal off the backing paper and onto your nail. Smooth it out gently and let it dry. Finish with a top coat.
GET THE PERFECT MANICURE AT HOME WITH OUR NAIL PRODUCTS >> SHOP NOW <<
Creating Gradient Nails
Creating gradient nails at home can be a fun and creative way to add a unique touch to your manicure. Gradient nails, also known as ombre nails, blend two or more colors together to create a smooth transition. This technique is easier than it seems and can be achieved with a few simple tools. Let’s explore the steps involved in creating gradient nails with two popular methods.
Ombre Technique
The ombre technique is a popular method for achieving gradient nails. It involves blending two nail polish colors to create a seamless transition. Here’s how you can do it:
- Choose Your Colors: Select two nail polish colors that complement each other. One should be a lighter shade, and the other a darker shade.
- Prepare Your Nails: Apply a base coat to protect your nails. Follow it with a coat of the lighter polish color and let it dry.
- Blend the Colors: Use a makeup sponge to apply the darker polish. Dab the sponge lightly on the nail to blend the two colors. Repeat the process until you achieve the desired gradient effect.
- Seal the Look: Apply a top coat to smooth out the surface and add shine. This will also help the gradient effect last longer.
Sponge Application
The sponge application method is another effective way to create gradient nails. This technique uses a sponge to blend the colors directly on the nail. Follow these steps:
- Gather Your Supplies: You’ll need two nail polish colors, a sponge, and a piece of plastic or foil.
- Prepare the Sponge: Paint stripes of both nail polish colors on the sponge. Make sure the colors slightly overlap to blend well.
- Apply the Gradient: Dab the sponge onto your nails. Start at the tip and move towards the base to create the gradient effect. Repeat until you achieve the desired look.
- Clean Up: Use a small brush dipped in nail polish remover to clean any excess polish around your nails.
- Finish with a Top Coat: Apply a top coat to seal the gradient and give your nails a glossy finish.
Creating gradient nails at home is a simple and enjoyable process. With these techniques, you can achieve salon-quality nails without leaving your home. Try experimenting with different color combinations to find your perfect gradient look.
Seasonal Nail Designs
Seasonal nail designs offer a fun way to celebrate each season. You can create beautiful nail art that matches the time of year. Let’s explore some ideas for spring, summer, fall, and winter nail designs. Get ready to get creative and enjoy stunning nails all year round.
Spring And Summer
Spring nails are all about fresh and bright colors. Think pastel shades like pink, lavender, and mint green. Floral designs are perfect for this season. You can draw tiny flowers or use flower decals for a quick fix. Polka dots and stripes also add a playful touch.
Summer calls for bold and vibrant colors. Neon shades of orange, yellow, and blue are great choices. Try beach-themed designs like palm trees, waves, or seashells. Fruit designs, such as watermelon or pineapple, are fun and refreshing. Experiment with different patterns to create a lively summer look.
Fall And Winter
Fall is the time for warm and earthy tones. Think deep reds, oranges, and browns. Leaf patterns and pumpkin designs fit perfectly with the autumn vibe. Try a matte finish for a sophisticated look. You can also use gold accents to add a touch of elegance.
Winter brings cool and cozy nail designs. Icy blues, whites, and silvers are great for this season. Snowflake patterns and glittery accents add a festive touch. You can also try plaid or sweater designs for a cozy feel. Darker shades like burgundy and emerald green are perfect for winter elegance.
GET THE PERFECT MANICURE AT HOME WITH OUR NAIL PRODUCTS >> SHOP NOW <<
Maintaining Your Nail Art
Maintaining your nail art is crucial for keeping your nails looking fresh and beautiful. Neglecting your nails can lead to chips, dullness, and fading. By taking a few simple steps, you can keep your nail designs looking perfect for longer.
Avoiding Chips
Chips can ruin your nail art. To prevent them, avoid using your nails as tools. Wear gloves when doing chores. Apply a top coat every few days. This will protect your design and keep it shiny. Be gentle with your nails. Treat them like jewels, not tools.
Touch-up Tips
Sometimes, touch-ups are necessary. Keep your nail polish handy for quick fixes. Use a small brush for precise application. Clean the brush with nail polish remover first. This helps to blend the new polish with the old. Apply a fresh top coat after touching up. This will seal your repair and keep your nails looking flawless.
Removing Nail Designs
Removing nail designs at home can be simple and safe. It’s important to use the right methods. This keeps your nails healthy and strong. Let’s explore safe removal methods and how to care for your nails afterward.
Safe Removal Methods
First, gather all needed supplies. You’ll need cotton balls, acetone, and aluminum foil. Start by soaking a cotton ball in acetone. Place it on your nail and wrap it with foil. Wait 10-15 minutes for the design to soften. Remove the foil and cotton. Gently push off the design with a wooden stick. Be careful not to damage your nails.
If you prefer a less harsh method, try soaking your nails in warm, soapy water. This method takes longer but is gentler. Soak your nails for 20-30 minutes. Use a wooden stick to remove the design. Repeat if needed.
Nail Care Post-removal
After removing your nail design, wash your hands with soap and water. Pat your nails dry with a soft towel. Apply a moisturizing cuticle oil to each nail. Massage the oil into your nails and cuticles. This helps restore moisture and prevent dryness.
Next, trim and file your nails to your desired shape. Use a gentle nail file to avoid splitting. Buff your nails lightly to smooth the surface. Finally, apply a strengthening nail polish. This helps protect your nails and promotes growth.
Frequently Asked Questions
How Do You Do Nail Designs At Home?
To do nail designs at home, gather nail polish, brushes, and nail art tools. Start with clean, shaped nails. Apply a base coat, design with tools, and finish with a top coat.
What Are Easy Nail Designs For Beginners?
Easy nail designs for beginners include polka dots, stripes, and accent nails. Use nail art tools or household items like toothpicks to create simple designs.
Can I Use Regular Polish For Nail Art?
Yes, you can use regular nail polish for nail art. Ensure the polish is of good quality and apply a top coat to seal the design.
How Long Do Diy Nail Designs Last?
DIY nail designs can last up to a week. Ensure you apply a base coat and a top coat to extend their longevity.
Conclusion
Creating nail designs at home is fun and easy. You can save money and get creative. Try new patterns and colors. With practice, your skills will improve. Share your designs with friends. They may want to join you. Enjoy the process and express yourself.
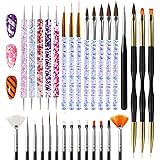
Artdone 31pcs Nail Art Brushes, Nail Art Tool Set, Dotting Tools, Dust Brush,Striping Brushes for Long Lines, Drawing Pen For Gel Polish Design supply
$6.99 (as of December 11, 2025 09:38 GMT +00:00 - More infoProduct prices and availability are accurate as of the date/time indicated and are subject to change. Any price and availability information displayed on [relevant Amazon Site(s), as applicable] at the time of purchase will apply to the purchase of this product.)