Nail art doesn’t have to be complicated. Simple designs can look stunning and stylish.
Nail art is a fantastic way to express your creativity. You can create beautiful looks without spending hours or breaking the bank. Whether you’re a beginner or an experienced artist, easy nail art designs are perfect for everyone. They allow you to experiment with colors, patterns, and techniques in a fun and approachable way.
In this blog, we’ll explore simple yet impressive nail art ideas. These designs will inspire you to try something new and add a personal touch to your nails. Get ready to transform your manicure routine with these easy and delightful designs. Let’s dive into the world of easy nail art and unleash your inner artist!
Introduction To Nail Art
Explore easy nail art designs that add a touch of creativity to your fingertips. Simple patterns and colors make stylish nails achievable for everyone. Try these fun ideas at home for a fresh look.
Nail art has become a popular trend among beauty enthusiasts. It allows you to express creativity through your nails. There are many easy designs you can try at home. Nail art is not just for professionals. With a little practice, anyone can create beautiful designs.
Why Nail Art?
Nail art is a fun way to showcase your style. It adds a personal touch to your appearance. You can match your nails with outfits or seasons. Nail art also gives a boost to your confidence. It shows attention to detail and creativity. Plus, it’s a great conversation starter.
Benefits Of Diy Nail Art
Creating your own nail art can save you money. Salon visits can be expensive. DIY nail art also provides a sense of accomplishment. You can experiment with different designs and colors. It’s a relaxing activity that reduces stress. Plus, you can do it with friends for a fun bonding experience.

Essential Tools And Supplies
Creating easy nail art designs at home is a fun activity. But to get started, you need to have the right tools and supplies. This section will guide you through the essential tools and must-have nail polishes for your nail art journey.
Basic Nail Art Tools
Before diving into nail art, gather these basic tools:
- Nail files: To shape and smooth your nails.
- Dotting tools: For creating dots and intricate patterns.
- Nail brushes: For painting and detailing.
- Striping tape: To create straight lines and geometric designs.
- Stencils: To help you with complex designs.
- Cuticle pusher: To push back and clean the cuticles.
- Tweezers: For placing small decorations.
Must-have Nail Polishes
To create stunning nail art, stock up on these nail polishes:
- Base Coat: Protects your nails and provides a smooth base.
- Top Coat: Seals your design and adds shine.
- White Nail Polish: A versatile color for various designs.
- Black Nail Polish: Essential for outlines and accents.
- Colorful Nail Polishes: Choose a variety of colors to create vibrant designs.
- Glitter Nail Polish: Adds sparkle to your designs.
With these essential tools and supplies, you’ll be ready to create beautiful and easy nail art designs at home. Happy painting!
Simple Designs For Beginners
Starting with nail art can be overwhelming. But don’t worry! There are many easy nail art designs that even beginners can try. These designs are simple yet stylish. Let’s explore some easy options!
Polka Dots
Polka dots are a classic and easy nail art design. They look cute and fun. All you need is a dotting tool or a bobby pin.
Here’s how to create polka dots:
- Apply a base coat to your nails. Let it dry.
- Choose a color for your dots.
- Dip the dotting tool in the nail polish.
- Gently press the tool onto your nails to make dots.
- Finish with a top coat to seal the design.
Polka dots can be small or big. You can even mix colors for a playful look.
Stripes And Lines
Stripes and lines are another simple design. They add a modern touch to your nails. You can create vertical, horizontal, or diagonal lines.
To create stripes and lines, follow these steps:
- Start with a base coat on your nails. Let it dry.
- Use striping tape to create clean lines.
- Apply your chosen nail polish over the tape.
- Remove the tape while the polish is still wet.
- Let the polish dry and apply a top coat.
Stripes and lines can be thin or thick. You can use different colors and patterns. This design offers endless possibilities.
These simple designs are perfect for beginners. They are easy to create and look great. Try them out and enjoy your beautiful nails!
Quick Seasonal Nail Art
Quick seasonal nail art can add a splash of fun to your look. These designs are easy and can be done in no time. You can change your nail art with the seasons, bringing a fresh touch to your style.
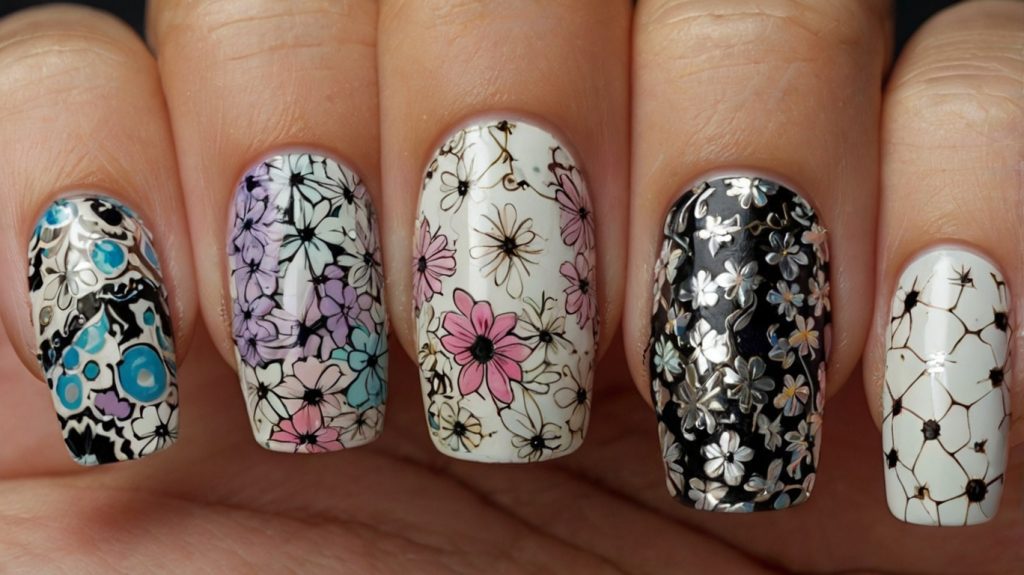
Spring Florals
Spring is the time for flowers and new beginnings. Floral nail art can bring this fresh vibe to your nails. Start with a pastel base. Use a thin brush to paint small flowers. Add tiny dots for the centers. Finish with a clear top coat. This design is simple yet elegant. It adds a touch of spring to your nails.
Winter Snowflakes
Winter is all about snowflakes and cozy vibes. Snowflake nail art is perfect for this season. Begin with a dark blue or white base. Use a thin brush to draw snowflakes. You can make simple lines or more detailed shapes. Add a bit of glitter for a frosty look. Seal it with a top coat. This design captures the essence of winter.
Geometric Patterns
Geometric patterns in nail art are stylish and versatile. They offer a fresh look that’s both modern and chic. These designs can be simple or intricate. Either way, they always make a statement. Geometric patterns are perfect for those who love clean lines and symmetry. This section will explore two easy and popular designs: Chevron and Triangle Accents.
Chevron Design
The chevron pattern is a classic choice for nail art lovers. Start with a base color. Once dry, use tape to create a V-shape. Paint over the tape with a contrasting color. Carefully remove the tape to reveal the chevron design. It’s a simple yet eye-catching pattern. You can use different color combinations for a unique look.
Triangle Accents
Triangle accents add a touch of elegance to your nails. Begin with a base color of your choice. Once it dries, use tape to form a small triangle at the base of the nail. Paint over the tape with another color. Remove the tape to show the triangle. This design is perfect for a subtle yet stylish touch. Try different angles and sizes for variety.
Elegant And Minimalist Ideas
Are you looking for elegant and minimalist nail art designs? These designs are perfect for any occasion. They are simple yet sophisticated. Let’s explore some easy and stylish ideas that you can try at home.
Negative Space
Negative space nail art uses the natural nail as part of the design. This creates a minimal and elegant look. Here’s how you can achieve it:
- Start with a clear base coat.
- Use tape to create shapes on your nails.
- Paint over the tape with your chosen color.
- Remove the tape carefully.
- Finish with a top coat for a glossy look.
Negative space designs can be simple lines, geometric shapes, or even a mix of both. This style is versatile and suits any outfit.
French Tips With A Twist
French tips are classic and timeless. Add a modern twist to make them unique:
- Begin with a neutral base color.
- Use a bright or metallic color for the tips.
- Try diagonal, curved, or asymmetrical tips for a fresh look.
- Apply a top coat to seal the design.
French tips with a twist keep the elegance of the original style. They add a fun and contemporary element to your nails.
These minimalist and elegant ideas are perfect for those who prefer a subtle look. They are easy to create and maintain. Try them out and enjoy your chic and stylish nails!
Fun And Whimsical Designs
Fun and whimsical nail art designs bring joy to your nails. These designs add a playful touch to your look. They are perfect for those who love unique and creative styles. Explore some fun and easy options below.
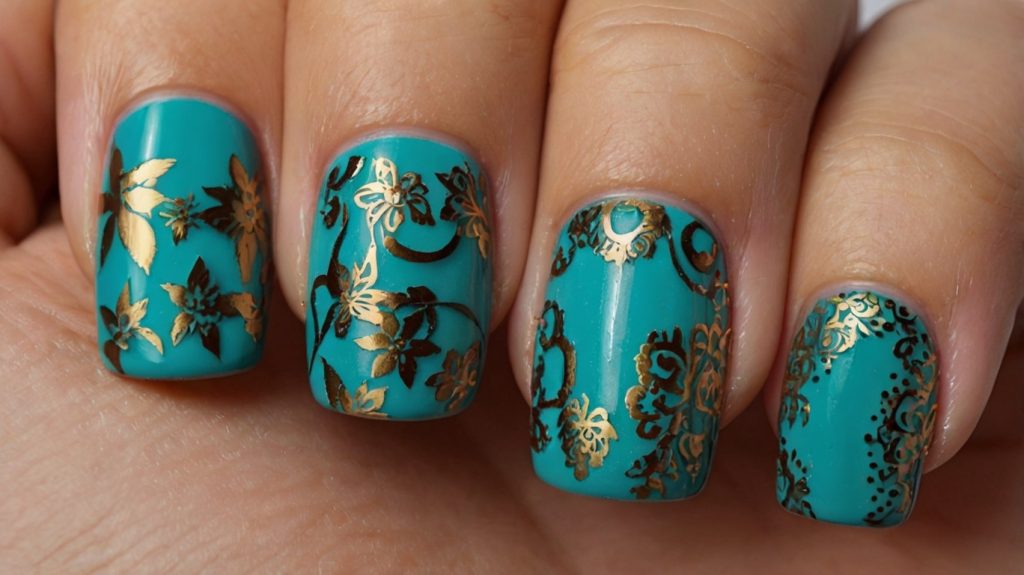
Animal Prints
Animal prints are a timeless favorite. Think leopard spots, zebra stripes, or cow patterns. They are easy to create and look stylish. You can use different colors to make them pop. Try using a fine brush or a nail art pen. Start with a base color, then add the prints. Seal with a top coat for a long-lasting effect.
Cartoon Characters
Cartoon characters can make your nails look fun and lively. Choose your favorite characters like Mickey Mouse, SpongeBob, or Hello Kitty. They bring a nostalgic feel to your nail art. Use bright colors and simple shapes. Begin with a base coat and let it dry. Then, draw the characters using a fine brush or nail art pen. Add details for a more defined look. Finish with a clear top coat to protect your design.
Maintenance Tips
Maintaining your nail art can be challenging, but with the right tips, you can keep your nails looking fresh and stunning for longer. Here are some essential maintenance tips to ensure your nail art stays beautiful and intact.
Protecting Your Nail Art
To protect your nail art, avoid using your nails as tools. This can chip the polish or damage the design. Wear gloves when doing household chores. This keeps your nails safe from harsh chemicals. Apply a top coat every few days. This adds an extra layer of protection and keeps your nails shiny.
Nail Care Routine
Maintain a proper nail care routine to ensure your nail art lasts. Keep your nails hydrated. Use cuticle oil daily to prevent dryness and peeling. Trim your nails regularly. This prevents breakage and keeps your nail art looking neat.
Give your nails a break between designs. This allows them to breathe and stay healthy. Avoid soaking your nails in water for too long. Water can weaken the nail bed and cause your nail art to chip. Use gentle nail polish removers. Harsh chemicals can damage your nails and make them brittle.
Frequently Asked Questions
What Are Easy Nail Art Designs For Beginners?
Easy nail art designs for beginners include polka dots, stripes, and simple floral patterns. These designs require minimal tools and practice. Starting with basic patterns helps build confidence and skill.
How Can I Create Nail Art At Home?
Creating nail art at home is simple with the right tools. Use nail polish, dotting tools, and thin brushes. Tutorials and practice can enhance your skills.
What Tools Do I Need For Nail Art?
Basic nail art tools include nail polish, dotting tools, thin brushes, and striping tape. These tools help create precise designs. Having a top coat is also essential.
How Long Does Nail Art Last?
Nail art can last up to two weeks with proper care. Applying a top coat and avoiding harsh chemicals helps maintain the design. Regular touch-ups can extend its longevity.
Conclusion
Creating easy nail art designs can be fun and rewarding. Experiment with colors and patterns that suit your style. You don’t need professional tools or skills. Even beginners can achieve stunning looks. Practice makes perfect, so keep trying new ideas.
Share your creations with friends and inspire others. Nail art is a great way to express yourself. Enjoy the process and show off your unique personality. Remember, the best designs come from having fun and being creative. Happy painting!

GAOY Sheer Light Pink Gel Nail Polish, 16ml Jelly Milky White Peach Translucent Color 1352 UV Light Cure Gel Polish for Nail Art DIY Manicure and Pedicure at Home
$7.99 (as of October 23, 2025 13:22 GMT +00:00 - More infoProduct prices and availability are accurate as of the date/time indicated and are subject to change. Any price and availability information displayed on [relevant Amazon Site(s), as applicable] at the time of purchase will apply to the purchase of this product.)